Print setup guide
Print at Actual Size and check the 50 mm ruler
If you entered a 40 mm frame and received a smaller print, first check scaling rather than enlarging the photo to compensate. The PDF's page size, the paper loaded in the printer, and the print dialog all need to agree. A preview that fits neatly on your screen does not prove the print will have the right dimensions.
Physical printing has not been tested for this release. Use a plain-paper calibration sheet on your own printer. Software measurements and PDF renderings cannot verify its paper feed, driver, or color output.
Set up one calibration print
- Match the sheet and paper. In the tool, choose the size you will actually load. A4 is 210 × 297 mm; US Letter is 215.9 × 279.4 mm; 4 × 6 inches is 101.6 × 152.4 mm. Leave Include a print-size check ruler selected.
- Download the PDF. Open that file in a PDF reader. Do not print a screenshot of the web preview: the screenshot has no reliable relationship to the requested physical size.
- Check the reader's print dialog. Choose the same paper size and orientation, one document page per sheet, and Actual Size or 100% scale. Booklet, multiple-pages-per-sheet, and Fit settings can change the size.
- Check printer properties too. A driver can have its own scaling or borderless-expansion setting. Use the printer's instructions to identify it. Keep a normal printable margin for the first test.
- Inspect the preview, then print once. Confirm that the photos and calibration rulers are visible. Use plain paper of the selected size, then measure the result.
Names and locations vary between PDF readers. Adobe documents that Actual Size leaves scale unchanged, whereas Fit adjusts the page to the printable area. Actual Size does not extend a printer's printable area: out-of-range content may be clipped.
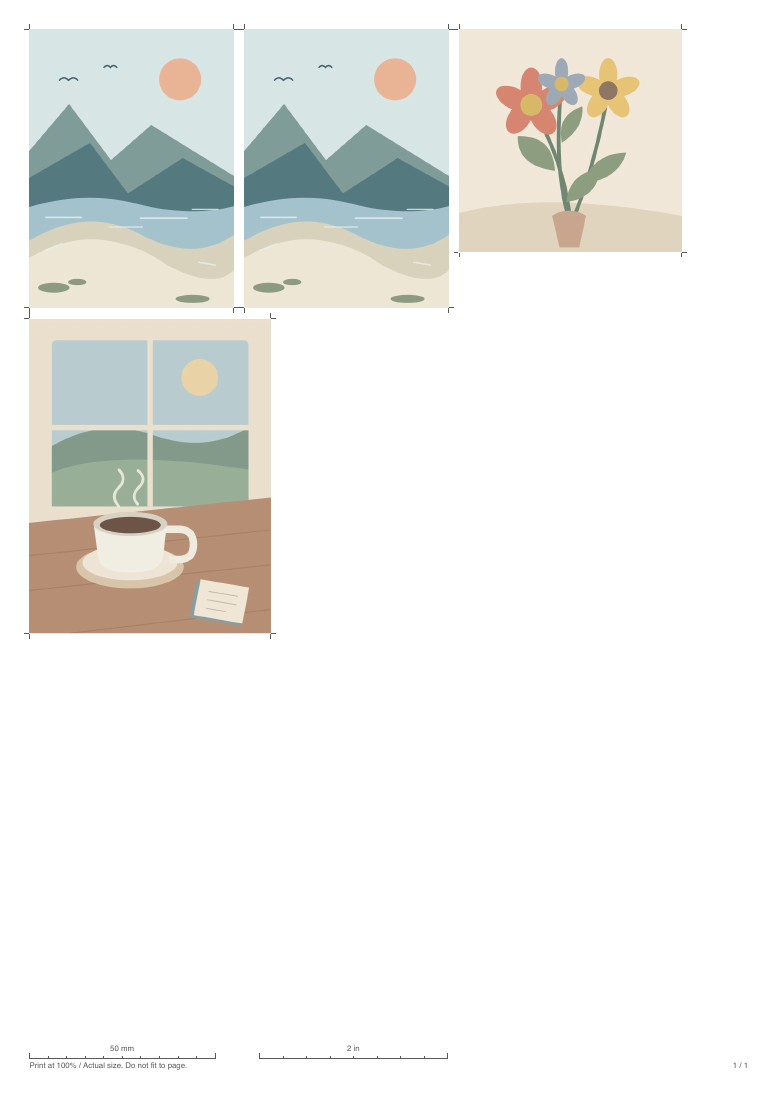
Measure the paper, not this image
This actual PDF rendering shows where the rulers appear. The image is reduced for the web. Download a sample PDF from the tool and measure the two end ticks after printing.
- Metric ruler
- 50 mm = 5 cm
- Inch ruler
- 2 in = 50.8 mm
The two lines are intentionally different lengths. Both are horizontal checks, not a test of paper-feed accuracy in the other direction.
Calculate the size change
A 50 mm mark measures 47.5 mm
47.5 ÷ 50 × 100 = 95%. The printed line is 5% shorter. Under uniform scaling, a 40 × 60 mm frame would become 38 × 57 mm. Check fit and driver settings before changing your intended frame size.
Keep the ruler flat and measure between the end ticks, excluding the text label. Also measure a photo frame vertically and horizontally. The two horizontal check rulers alone cannot confirm that both directions are equally accurate.
| What you see | What to check |
|---|---|
| Everything is smaller | Paper-size mismatch, Fit, multiple pages per sheet, or a separate driver scale. |
| Size is right but edges are missing | Printable margins. Increase the layout's outer margin while keeping 100% scale. |
| Frame is right but the picture is smaller | Keep whole photo may leave white space inside the frame. This is fitting behavior, not necessarily print scaling. |
| Size is right but detail is soft | Source pixels, focus, paper, and quality settings; start with the resolution guide. |
Retest after changing settings. A new printer, paper size, or PDF application deserves another check. Once the test fits your project, make a single final-quality print before committing several sheets of photo paper.
Prepare a sheet with check rulers
Keep the ruler option enabled and download the sample PDF or a sheet of your own photos.